How to install an automatic garage door opener


Q: It’s high time I install an automatic garage door opener. I have a two-car garage with a metal door in hinged sections. How do I get started?
A: For your door, I recommend buying a one-half-horsepower opener. Home centers stock three types: a chain drive (starting at about $170), a screw drive model and a belt drive (each $200 or more). I prefer the screw drive or belt drive because they are quieter and have less vibration. Plan on three to four hours for installation.
To start, remove the locking mechanisms, which are located on both sides of the tracks. If you don’t, the opener won’t be able to lift the door.
You’ll see a cable attached to the door’s handle. When the handle is turned, it pulls the cable that lifts the latches out of the locking brackets. Use a socket wrench and an adjustable wrench to remove them.
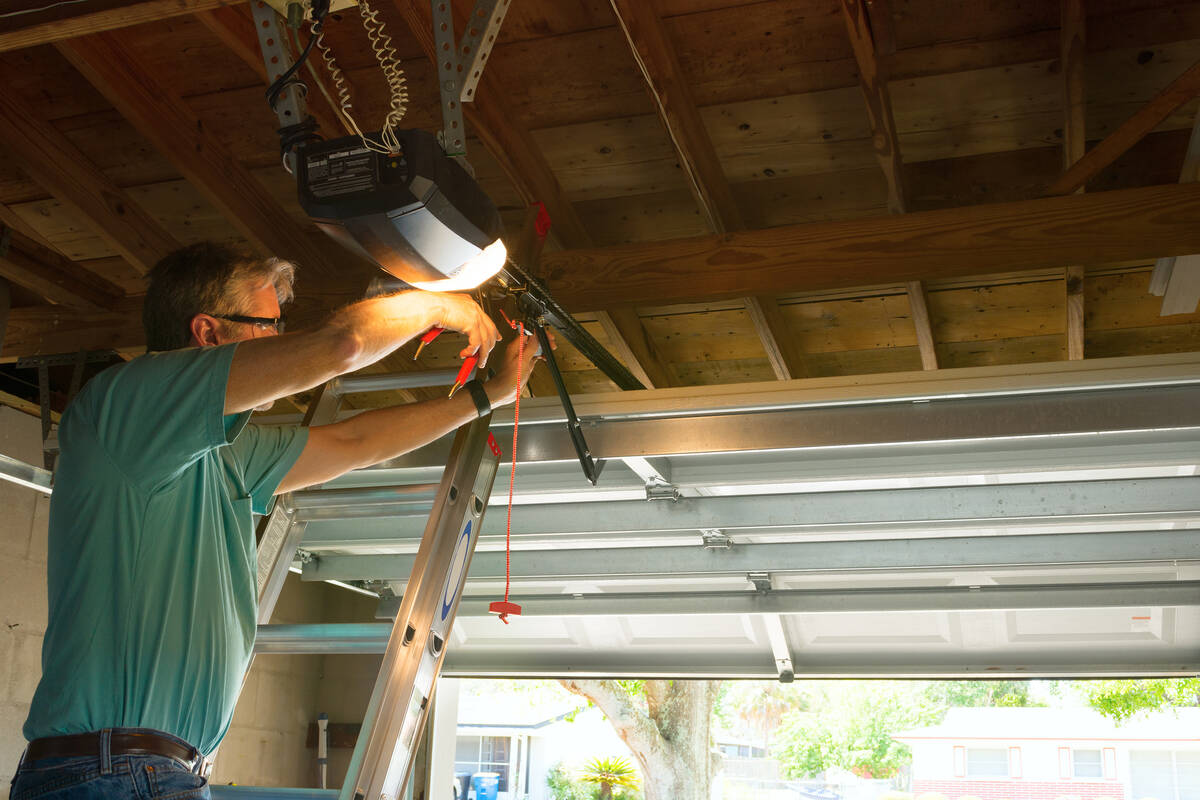
Next, assemble the opener. An assembled opener is about 10 feet long, so you know there is some significant assembly. Fortunately, the instructions are easy to follow.
Close the door, stand on a ladder, and find the midpoint of the door. Draw a vertical line along the midpoint on the header (the horizontal support beam above the door).
Next, determine the door’s highest point of travel. Open it slowly and watch it travel up the track. Extend a tape measure from the floor and measure the distance at the highest point of travel. Add this length to the required rail clearance, which is stated in the manual. Mark a horizontal line at this height along the header.
The intersection of the two lines is where to install the header bracket. If the torsion spring (the black coiled spring that runs along the top of the door) is in the way, move the bracket up until the rail clears the spring. Drill pilot holes and secure the header bracket to the header using the lag bolts supplied with the opener.
Next, place the motor unit on the ground and lift the end of the rail to the header bracket. Bolt the rail to the bracket, then swing the motor unit up and rest it on the ladder.
The opener includes two metal supports to suspend the motor unit. They’re quite flimsy. Instead, buy a length of perforated angle iron (about $10) and mark its location directly above the mounting ears of the motor unit.
Use a stud finder to locate the framing in the ceiling and attach the angle iron, perpendicular to the direction of the rail, to the framing with lag bolts. Level the rail, then attach the motor unit to the angle iron with additional pieces of angle iron or the metal straps that came with the opener.
To connect the opener to the door, attach the door bracket to the door with the bolts provided. The door bracket is located on the door’s center support, about even with the height of the door’s top rollers. Attach the “L” arm to the door bracket and the straight arm to the carriage. (The carriage moves along the bottom of the rail to pull the door open or push it closed.) Both arms are held in place with a bolt and a cotter pin.
Attach the electric sensor eyes about 6 inches above the floor on both sides of the door. Run the wires from the sending eye to the receiving eye, then to the motor unit. From the motor unit, run the wires to the wall control. Fasten the wires to the wall with staples, but don’t pierce them.
Different openers have different methods of controlling the movement distance and force of the door. Some openers control the distance of travel with limit switches on the rail. If you have this type, mount the upper limit switch about 12 inches from the motor unit, and mount the front limit switch about 1 inch back from the front of the carriage.
Other openers have dials on the back used for adjustment. To control the force, openers have either a clutch adjusting knob or dials on the unit. Set the force so that it’s just enough to move the door.
Next, set the remote control frequency to match that of the motor unit. Some models may require setting the dip switches in both. On others, the frequency is randomly selected. Just push the button on the back of the motor unit until it blinks, then push the button on the remote control.
Press either the wall control or the remote. The opener may need adjusting. If the door raises only a few feet and then stops, increase the force. If it doesn’t close completely, increase the length of its downward travel.
Finally, make sure the door reverses properly by placing a 2-by-4 or a roll of paper towels under the door and closing it. The door should reverse when it hits the obstruction. If not, move the limit switch forward one-sixteenth of an inch until it does.
Test the sensor eyes by blocking their path (again, use an object) while the door is closing. If the door doesn’t reverse, check the wiring. The opener won’t work without the sensors properly aligned and connected.
Mike Klimek is a licensed contractor and owner of Las Vegas Handyman. Send questions to handymanoflasvegas@msn.com or 4710 W. Dewey Drive, No. 100, Las Vegas, NV 89118. Visit handymanoflasvegas.com.
Do it yourself
Project: Install a garage door opener
Cost: Around $170
Time: 3-4 hours
Difficulty: ★★★★