Drooping agave leaves signal irrigation problem
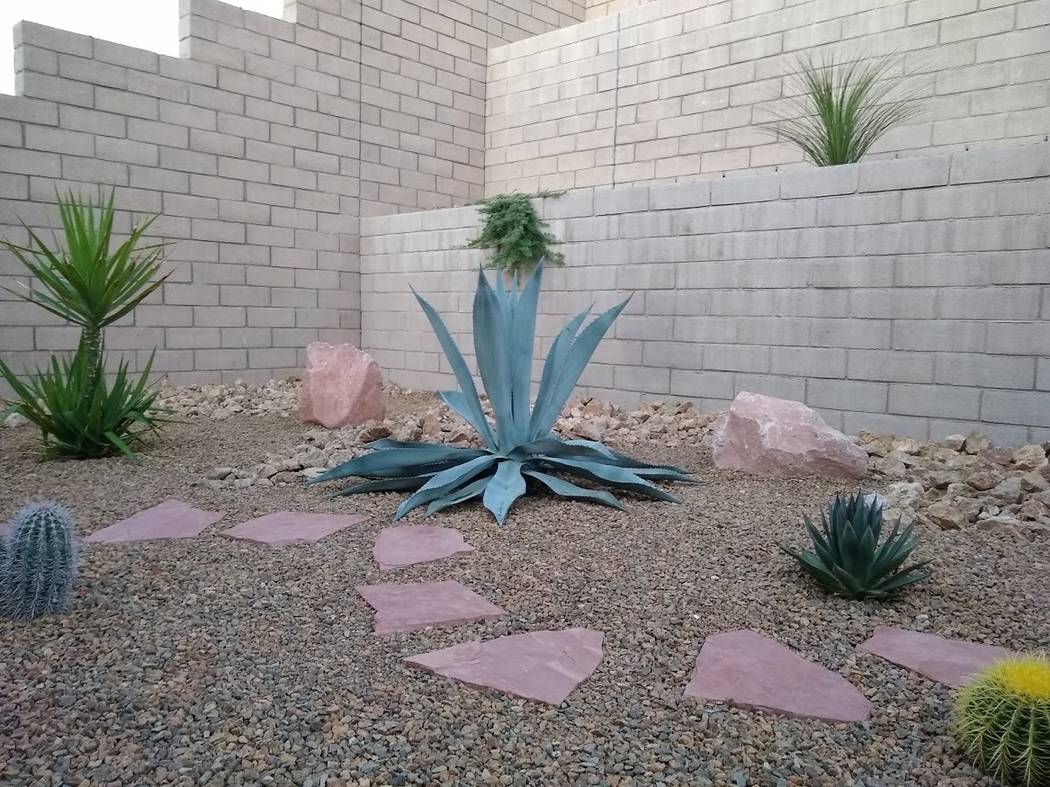
Q: Over the last month the leaves of my Weber’s agave I planted in May have been drooping to the ground. I thought my watering of three days a week for 20 minutes was too much, so I stopped watering it Oct. 4. It’s still doing it. Is it the weevil killing it?
A: The issue is how it is irrigated or possibly an insect problem. Both watering improperly and grubs feeding on the roots might cause the leaves to droop. Agave weevil feeding on the roots was a possibility earlier in the year. But watering three days a week is too often. When leaves droop in fall, it is most likely signaling an irrigation or a water drainage problem.
Agaves, when they are watered, like to be given plenty of water and then no water for a long time. They don’t like small sips of water. They like a dry period between irrigations to let the roots dry out and start using internal water that was stored. Infrequent watering keeps them from growing too fast.
Never put them on the same valve or irrigation cycle as other plants in the landscape. They do not like frequent watering as you would do with fruit trees and other landscape plants.
If it’s an insect grub feeding on the roots, it’s a problem seen in spring or early summer, not fall. If it is a grub eating the roots, pea-sized holes gnawed in the leaves might be seen. If the leaves are clean with no holes, then chances are it’s a watering problem.
What to do? Water the larger agaves with about 10-15 gallons of water each time and the smaller ones with about 5-10 gallons. Hold off on watering again until the soil dries out. I don’t know how many days that would be because I don’t know your soil.
Sandy soils dry out quickly, so they are watered more often. Heavier soils that contain silt or clay hold water more like a sponge and are watered less often. But midsummer watering might be seven days apart in sandy soils and maybe two to three weeks apart in heavier soils.
Get a soil moisture meter and push the tip into the soil about 4 inches deep and water when the meter reads about 3 on the scale. Apply a liquid insecticide drench around the plant in the spring to prevent grubs from eating the roots. Fertilize once a year in the early spring just before or shortly after it wakes up from its winter nap. Never apply an insecticide drench just before or during flowering.
Q: I have an oleander in a big pot that was taken from a tree oleander and given to me. I grew it outside. I went on vacation in the middle of summer, and it got hot and no water was applied so it died. But now I am seeing some green leaves sprouting and it started to come back. When is the best time to plant it in the ground?
A: When a plant is growing in a pot or container, you must keep an eye on it, particularly if it is not a desert plant. Oleander is not a desert plant. It is a Mediterranean plant, and you can kill it if it is neglected. It is much safer to grow plants in the ground when you are away on vacation and can’t keep an eye on them. Their roots can access more water that way.
Sounds like nature was with you and it came back when the weather cooled off and maybe there was a little bit of rain. In the future, irrigate dead-looking plants even if you think they are not alive. If they have any life left at all, cut them back, and they might spring back to life. If they don’t get any water, eventually these types of plants are goners. They are drought tolerant but not indestructible.
Oleander is one of the easiest plants to grow in the desert provided they are watered. If they don’t get enough water, their leaves scorch, and they flower and grow poorly. They are high in water use, so give them plenty of water if you want them to flourish.
They are also drought tolerant. Drought tolerant is not the same as low in water use. The terms are not equivalent.
If you are not going to keep an eye on your potted oleander, plant it properly, get it in the ground and put some irrigation on it. Plant it either in the fall months of October and November or in the spring from late January through April.
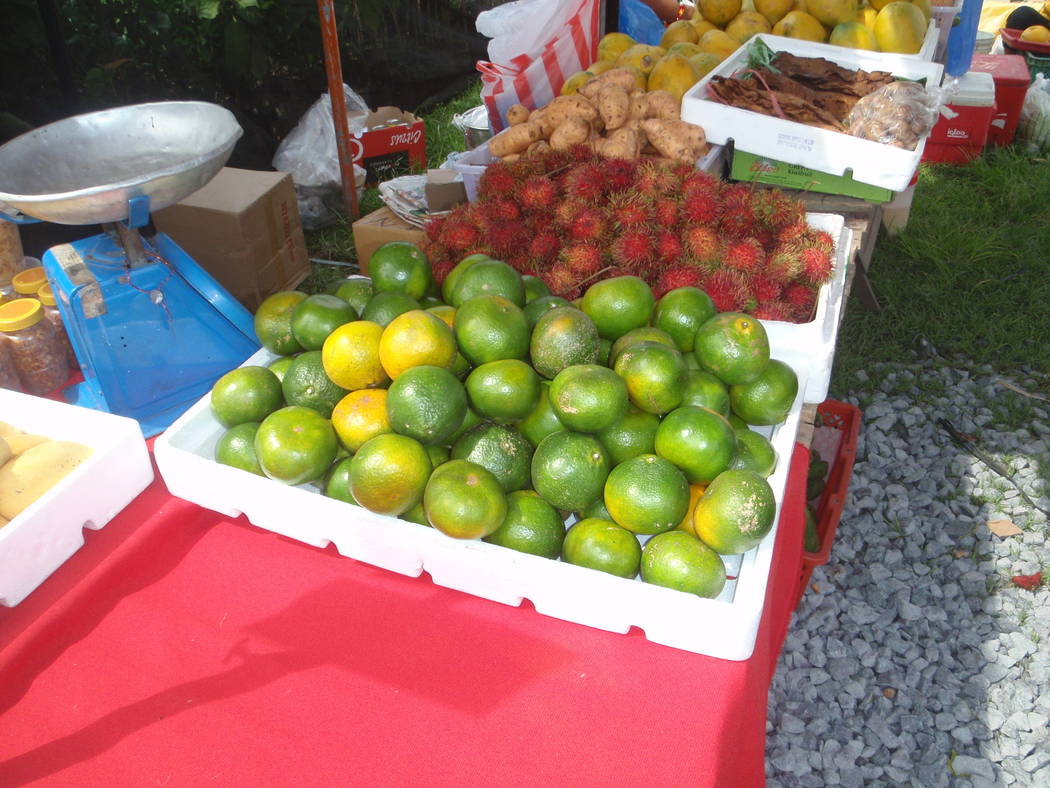
Q: I have an orange tree that has produced eight large oranges. A few have small orange spots that show they are ripening. However, five are still all green. My question is should I harvest all the oranges and place them in the windowsill to ripen? Can you please explain what the problem is with their not ripening?
A: Citrus fruit does not ripen after they are picked. They develop their full flavor if left on the tree to ripen. There are different kinds of oranges, and they will ripen from late October into December depending on the orange variety.
Be patient. In the warm tropics, oranges stay green when they are ripe and sold that way in local markets. In our colder climate, they turn orange when ripe. Sometimes oranges are picked green and forced to turn orange by gassing them with ethylene. But they are not fully ripe if you do that.
A better option is to pick one and taste it. If you like how sweet it is, harvest them all. But in our climate, they should turn orange when ripe.
The University of Arizona published a document that contains a table that tells you when different types of oranges are ready for harvest. You must adjust the harvest date two to four weeks later for our cooler climate. You can access it at https://bit.ly/2MYRhOm.
Q: Our blue yucca filamentosa has doubled in size in six months and now seems to have as many as four new plants growing in a clump around the original plant. When and how are these new plants best removed? We would also like for it to stay about the same size. Any way to slow the growth?
A: That plant can get 3 feet wide and up to 8 feet tall. If it is in a spot that is smaller than this, I recommend that you move it to a new location that can handle its size rather than try and manage it to stay smaller.
This yucca does not handle extreme hot locations and dry soil very well. It is not a desert yucca and not native to desert climates.
You can remove the new shoots, or pups as they are called, any time it is cool and there is enough time for its roots to heal before getting too cold or too hot. That means doing it either now until about mid-November or in the spring starting about mid-February through April.
Other times of year will work but is riskier and you must go through some horticultural gymnastics for good results. Now and in the spring are the easiest times to pull it off.
You will get dirty doing this, but wet the soil under the yucca to about 12 inches deep. Pull the soil away from the plant until you see how the pups are attached to the mother plant. They are attached to the mother plant on short rhizomes or underground stems.
Use a sanitized pruning shears or knife and cut through the rhizome as cleanly as possible. Cutting this “umbilical cord” between the mother yucca and the pup will isolate these baby plants. They are on their own once the rhizome is cut.
Remove the pups and let their cut rhizome heal for a day or two in the shade. Just lay them in the shade somewhere. Nothing fancy but not in the sun.
Use 1 gallon nursery containers or large cans with holes punched in the bottom and fill them with clean garden soil or landscape soil to within 1 inch of the rims. Plant them in these containers and water and fertilize them until you see new growth. At this time, move them into a new planting area or give them away.
Bob Morris is a horticulture expert and professor emeritus of the University of Nevada, Las Vegas. Visit his blog at xtremehorticulture.blogspot.com. Send questions to Extremehort@aol.com.


