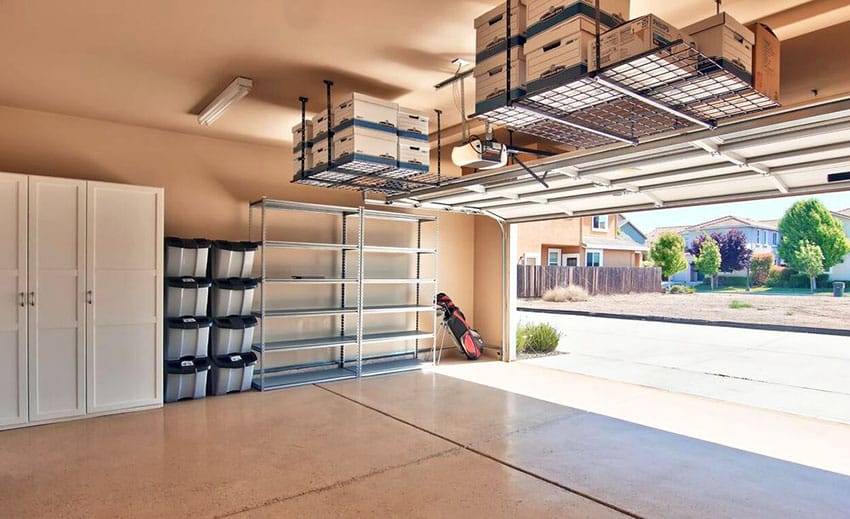
Overhead storage racks clear away items in garage

Q: I have had enough of the stuff in my garage. There are boxes scattered everywhere and nowhere to put them. I was cruising down the aisles of the home center, and I noticed some overhead storage systems. How much stuff can I store on these and how hard are they to install?
A: I have been in many garages just like yours. One time, I was going to check out a customer’s water heater and, when we got there, we couldn’t even see it. It was tucked away in the corner of the garage behind years of accumulated treasures.
When that happens, it’s time for a garage sale.
Overhead storage systems, either store-bought or homemade, are an excellent way to clear out a place to walk in your garage. The store-bought systems measure 45 inches square or 48 inches square (they can be connected together) and can be mounted to ceiling joists at either 16-inch centers or 24-inch centers.
You can adjust the height of the storage racks to hang generally 16 inches to 28 inches from the ceiling, so watch your head as you walk. When installed, you will have about 30 cubic feet of storage space per rack.
You can hang one rack or several next to each other. This will help disperse the load, but you shouldn’t hang more than two racks on the same set of joists (depending upon the brand, each rack can hold as much as 700 pounds).
Start by measuring the width of the joists and planning where you want to install the racks. You need to be careful of the garage door opener and the door tracks so that the racks won’t interfere with the operation of the door. You can still install racks above the tracks, but just make sure that the door won’t hit the racks over the course of its travel.
Once you’ve selected where you want to install the racks, you need to find the ceiling joists. Run a stud finder across the ceiling and mark the location of the joists.
The racks hang by four rods that are attached to the ceiling with brackets. The bottoms of the rods hold the grids that support the weight of the items you will store.
You can temporarily hold the angle brackets to the ceiling with a nail until you insert and crank down the lag bolts. Use the support bars as a template to locate the position of the ceiling brackets (these support bars will be used later in the assembly).
Once you have the spacing correct, nail the other brackets to the ceiling also. If you need to move one, it’s easy to just pull it out of the drywall and place it where you want. Each bracket requires two lag bolts (supplied with the kit) and should penetrate the ceiling joists by at least 1½ inches. Just remember to predrill the holes for the lag bolts.
Once all four brackets are secured to the ceiling, attach the down rods to them. The down rods come in two pieces so that you can adjust the height of the rack.
The first piece, the straight rod, is bolted to the ceiling bracket. The second piece has an elbow at the bottom and attaches to the first piece with two bolts. The elbow support is at the bottom of the second piece and attaches to the tray.
When you have all four down rods assembled and adjusted for height, you can add the support bars. The support bars connect the bottom of the down rods. The support bars rest on top of the elbow of the down rods and get bolted to them. Now you can tighten up all of the bolts.
Insert the grids on top of the down rods and bolt them to one another and to the support bars. If you want to add additional racks next to each other, you can connect them with the provided tie straps.
The only thing you have to worry about now is that if you are tall, you might crack your head on the rack as you pass by.
Mike Klimek is a licensed contractor and owner of Las Vegas Handyman. Questions may be sent by email to handymanoflasvegas@msn.com. Or, mail to 4710 W. Dewey Drive, No. 100, Las Vegas, NV 89118. His web address is www.handymanoflasvegas.com.